Documentation > Tasks
TASKS
CONTENTS
- The Task List
- Creating Once Off Tasks
- Creating Recurring Tasks
- Updating and Deleting Tasks
- Assigning Workers
- Completing Tasks
- Permissions
- Alerts
THE TASK LIST
To view all Tasks, navigate to the Task List by clicking the Tasks button in the main menu.
In the Task List, you can use the filters (dates, status, clients, and users) to search for particular tasks. When you select the filters, click the “Filter Tasks” button to filter the tasks.

To view a task’s page, click the Information button next to the task. To create a new task, click the New Task button. Then select the Type of task: once-off, or one of the many recurring types. This will then open the New Task page.
To assign an existing task to a user, or complete a task, see below sections.
CREATING ONCE OFF TASKS
To create a new Once Off Task, navigate to the Task List, click the New Task button and click the Once Off button.

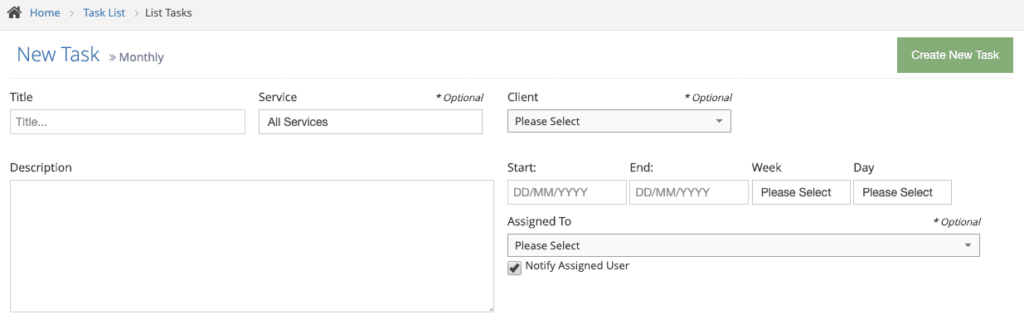
Then, on the New Once Off Task page, fill in all the information you have for the task.
The mandatory fields are the name of the task, the due date, and a description for the task. You can also fill in the client the task refers to, the worker the task will be assigned to, and the service the task is part of. These fields are optional.

Once the task’s information has been entered, click the Create New Task button to create the task on the system.
If it was assigned to a worker, they will now be able to see the task on their Task List and in their Task Alert button once it is close to the deadline. If the “Notify Assigned User” checkbox is ticked, the assigned worker will also receive an email notification about the task.
CREATING RECURRING TASKS
To create a Recurring task, navigate to the Task List, click the New Task button, and select the type of recurring task you are creating. The types are as follows:
- Daily: This task will be due on every day between the start and end dates. Eg: creating meal labels, entering new client information
- Weekly: This task will be due once a week on the weekday selected between the start and end dates. Eg: creating end-of-week payment reports
- Fortnightly: This task will be due once a fortnight on the weekday selected between the start and end dates. Eg: checking stock levels and ordering upcoming meals
- Monthly: This task will be due once a month on the date selected between the start and end dates. Eg: creating monthly invoices
Once you’ve selected the type of task, you’ll be taken to the New Recurring Task page.
Fill in all the information for the task, then click the Create New Task button to create your task. If it was assigned to a worker, they will now be able to see the task on their Task List and in their Task Alert button once it is close to the deadline. If the “Notify Assigned User” checkbox is ticked, the assigned worker will also receive an email notification about the task.
EDITING AND DELETING TASKS
To edit a task, first navigate to the Task List. Then click the Information button next to the task to view its Task Page.
On the Task page, you can choose to either Complete the task (as seen below), Edit, or Delete the task.

To Edit the task, update any information that is incorrect and then click the Edit Task button. This will save your changes and log the update in the Task History list.
To Delete the task, click the Delete Task button on the Task Page. Click the “Yes – Delete” button on the Confirmation Popup, and the system will delete the task. The system will also add this to the System Log.


ASSIGNING WORKERS
To assign a worker to a task or an instance of a task, navigate to the Task List. Find the task you want to update, and click the yellow Person icon in the “Assigned To” column. This will open the Assignment Popup, where you can change who the task is assigned to.
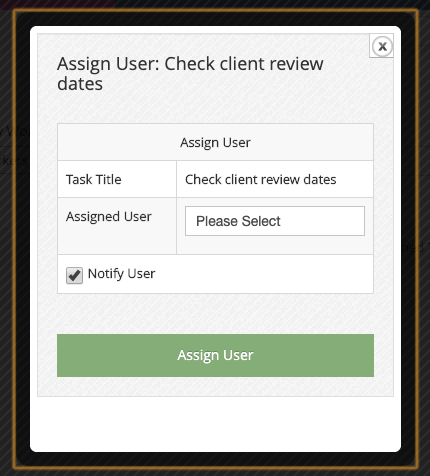
Once you’ve selected the worker, click the Assign User button to update the assignment. If the “Notify User” checkbox is ticked, the assigned worker will also receive an email notification about the task.
COMPLETING TASKS
To complete a task, navigate to the task list or the task itself. On the Task List, click the green Checkmark icon. On the Task Page, click the Complete Task button. If someone else completed the task, change your name to theirs. Select the date the task was completed, and fill in any information about the task completion. Once that’s done, click the Complete Task button.
The task will now be marked as Complete, and will no longer appear as an outstanding or upcoming task.

PERMISSIONS
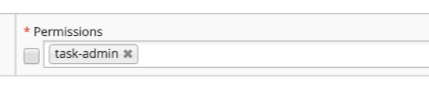
By default, a user can only view tasks assigned to them. If a user has the “task-admin” permission added to their account, they will be able to view all tasks. Usually, only the person who creates and assigns jobs will need this permission.
ALERTS
If a user has upcoming or outstanding tasks assigned to them, they will be displayed in the Task Alert box in the top bar of Polixen.

To view these tasks, click on the Task Alert box. This will display a list of all the upcoming and outstanding tasks. Click on a task to view its page.